Announcement

Collapse
No announcement yet.

Vinyl Flooring Question

Collapse
X
 
  • Filter
  • Time
  • Show
Clear All
new posts

  • wygieman
    replied
    Originally posted by Andi View Post

    Hi wygieman , I found the other thread where you describe the process. Two questions, how did you remove the trim without destroying it? (Not sure how it is attached.) Also, it seems like it would be hard to get access to the slider to glue the felt on. Did you just put a thin strip of felt as far back as your fingers could reach?

    Thanks,
    Andi
    The trim removes easily if I remember correctly. I think it is screwed down through the top. If it is stapled, it pops off also - no glue. I am not near my rig right now to check but I did screw down the same trim piece from the top without damage. The plastic slider is accessible with the trim off when the slide is all the way in. We cut the pieces to fit and overlap the edges a bit. Doing one plastic slider at a time, we put a bunch of super glue on the felt and then extended the slide out partially until it pressed the felt to the vinyl about midway. A minute or two and it is dry and you bring in the slide to do the next one. The felt I used was 1/2” thick for heavy furniture:

    https://www.amazon.com/gp/product/B0...?ie=UTF8&psc=1

    Cut to size and glue the pieces together before glueing to the plastic slider. Hope this helps.

    Leave a comment:


  • Andi
    replied
    Originally posted by wygieman View Post
    I agree with Rob that you probably have the plastic sliders instead of rollers. We do on our 218 303 which has a similar heavy slide. When the slide started tearing up the vinyl, a friend who also has a 303 came up with the idea of using furniture felt on the plastic sliders. We simply glued the 1/2” felt onto the sliders and have not had another problem in a couple of years of use with lots of moving around. I don’t like the idea of having to use slide slickers though I carry them just in case. The plastic sliders are 18” long and I believe there are four of them so there is a lot more surface area for contact than the rollers. I expected I might have to replace the felt every so often but so far so good. Process is described in one of the many slider threads if interested.
    Hi wygieman , I found the other thread where you describe the process. Two questions, how did you remove the trim without destroying it? (Not sure how it is attached.) Also, it seems like it would be hard to get access to the slider to glue the felt on. Did you just put a thin strip of felt as far back as your fingers could reach?

    Thanks,
    Andi

    Leave a comment:


  • Andi
    replied
    Cate&Rob thanks for the photos and description. Very helpful for me. We moved yesterday and put the slickers where our rollers were. Still had the vinyl lifting up at the edge of the plastic slider when extending the slide. We're moving again today and will try the slicker under the slider. (Say that fives times fast - slicker slider, slicker slider, slicker slider, slicker sslldd, ssllllkk.... ) Will let you know how it goes.

    Leave a comment:


  • wygieman
    replied
    I agree with Rob that you probably have the plastic sliders instead of rollers. We do on our 218 303 which has a similar heavy slide. When the slide started tearing up the vinyl, a friend who also has a 303 came up with the idea of using furniture felt on the plastic sliders. We simply glued the 1/2” felt onto the sliders and have not had another problem in a couple of years of use with lots of moving around. I don’t like the idea of having to use slide slickers though I carry them just in case. The plastic sliders are 18” long and I believe there are four of them so there is a lot more surface area for contact than the rollers. I expected I might have to replace the felt every so often but so far so good. Process is described in one of the many slider threads if interested.

    Leave a comment:


  • Cate&Rob
    replied
    Andi
    Hi Andi,

    The slides move on rollers fastened to the main floor. Like the black one to the right in the attached picture. Some slides have travelling rollers like the grey one to the left in the attached picture. On some builds, these travelling rollers were replaces with plastic sliders . . . which it sounds like you may have. As the slide come in, it reaches its balance point at about half travel and the part inside the main rollers becomes heavier than the part still outside and the slide box dips down towards the floor. This is when the travelling rollers/sliders can make contact with the floor and can damage it.

    To determine where to put your slide slickers, bring the slide in very carefully and watch for where it dips towards the floor and find the contact points (the rollers/sliders). This is where you should position the slide slickers. I had to cut mine shorter to fit between the kitchen slide and the island. My slide slicker locations are not normally outlined in masking tape (as shown in the attached) but if I take the trailer in for service work by somebody else, I clearly mark the slide slicker locations for them.

    Rob
    Attached Files

    Leave a comment:


  • Beachcamper
    replied
    Originally posted by Andi View Post

    Thanks, Vivian, good idea to check with CS. I sure hope it doesn't come down to needing to have the slide pulled!
    Andi, I just had the kitchen slide pulled out enough to move the end rollers last week. It’s really not a big deal to do for them, worst part is removing the horseshoe trim along the top and sides. Then they disconnect the gas lines and pull out the slide. I had it done at the factory but a knowledgeable dealer could do it as well. Ask GD who to take it to in your area If going to factory is not an option for you.

    Leave a comment:


  • Andi
    replied
    Originally posted by Beachcamper View Post
    Before you do anything, send that video to customer service see what they recommend. One solution is to have GD or dealer pull slide out enough to reattach floor to the edge. Looks like it was worked loose by continuous use of slide.
    Thanks, Vivian, good idea to check with CS. I sure hope it doesn't come down to needing to have the slide pulled!

    Leave a comment:


  • Andi
    replied
    Originally posted by Cate&Rob View Post
    Andi
    Hi Andi,

    Is there a “travelling roller” (attached to the bottom of the slide) aligned with the bulge in the vinyl? If so, I think that pressure from this roller may be stretching the vinyl. The slide slickers will help with this. Position them under the travelling rollers with the heaviest pressure at mid travel of the slide. Also make sure that these rollers are rolling freely and not dragging on the vinyl flooring.

    Rob
    Hi Rob,

    I don't believe there is a roller there. Where the other piece of tape is I can see a metal bracket on the floor. There's another one of those brackets approx. 33" to the right (roughly one on each side of fridge, but it's not really centered).

    If I run my finger along the underside of the slide, I can feel an additional piece of wood (hard plastic?) that starts where the bulge is and runs for about 18" to the right. This hangs down just a little lower (maybe 1/8") than the trim piece on the slide. Is this the traveling roller you're referring to?

    We had planned on putting the slickers where the metal brackets are on the floor. Maybe that's not the right place to position them?

    Do you know of photos or diagrams of what these slides look like? I tried looking on Lippert's site but didn't find something to help me understand how they work.

    Leave a comment:


  • Andi
    replied
    Originally posted by Country Campers View Post
    Andi

    I believe that the floor is not glued entirely down , only at edges I think. You could slice the bubble and put down glue to hold it in place. I have not down this in an RV before but have fixed some in our house long ago.

    Brian
    Thanks, Brian, that's what I was planning to do, but didn't know if it would cause additional problems since the rest of the floor wasn't glued.

    Leave a comment:


  • Beachcamper
    replied
    Before you do anything, send that video to customer service see what they recommend. One solution is to have GD or dealer pull slide out enough to reattach floor to the edge. Looks like it was worked loose by continuous use of slide.

    Leave a comment:


  • Cate&Rob
    replied
    Andi
    Hi Andi,

    Is there a “travelling roller” (attached to the bottom of the slide) aligned with the bulge in the vinyl? If so, I think that pressure from this roller may be stretching the vinyl. The slide slickers will help with this. Position them under the travelling rollers with the heaviest pressure at mid travel of the slide. Also make sure that these rollers are rolling freely and not dragging on the vinyl flooring.

    Rob

    Leave a comment:


  • Country Campers
    replied
    Andi

    I believe that the floor is not glued entirely down , only at edges I think. You could slice the bubble and put down glue to hold it in place. I have not down this in an RV before but have fixed some in our house long ago.

    Brian

    Leave a comment:


  • Andi
    started a topic Vinyl Flooring Question

    Vinyl Flooring Question

    In my 2018 337, I'm having an issue with the vinyl flooring bubbling in front of the refrigerator - I know, nothing others haven't experienced . I was going to repair by injecting adhesive, but as I poked a needle around to see how large the 'bubble' is, it made me wonder whether our flooring is actually glued down or not? I'm now thinking it isn't, so is glue the correct way to repair?

    I did just receive a set of Slide Slickers, and Rudy modified them for vinyl as posted elsewhere on the forum. We have not tried them yet to see if they eliminate the problem, but just thought I'd check to see if anyone had any other suggestions for us.

    Video below shows what's happening, at least it hasn't torn yet! Watch the area in front of the first piece of masking tape that's visible.
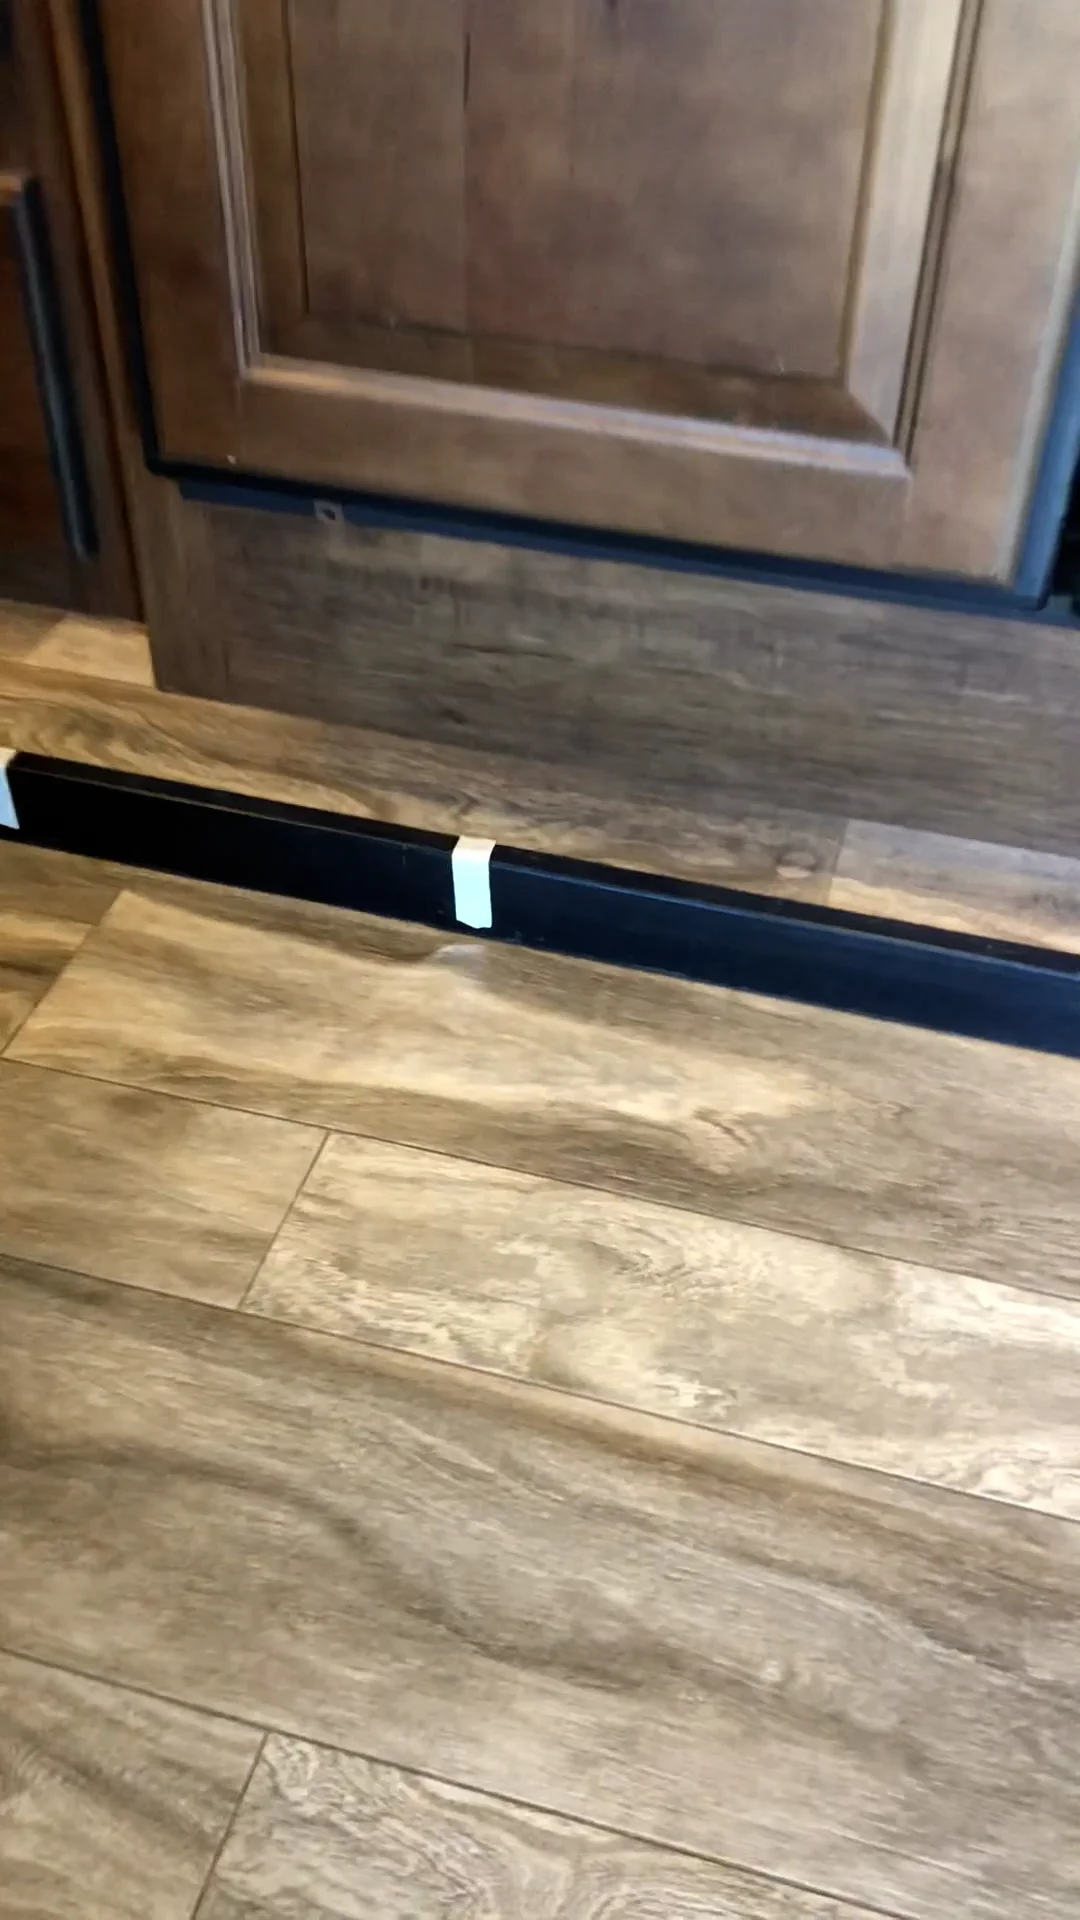
Working...
X